Friday, January 21, 2011
Wednesday, January 19, 2011
Photoshop and Aurora 3D Text & Logo Maker Create Amazing 2011 Text Effect
In this Photoshop tutorial I will teach you how to use the “Aurora 3D Text & Logo Maker” to make 3D text effects, and then in Photoshop to add decoration. Look at the following effect diagram, the effect is good, right, then let us begin.
 1、 We use Aurora 3D Text & Logo Maker to create the 3D effect, and then import it into Photoshop. First, use the left side of the text tool, create a text.
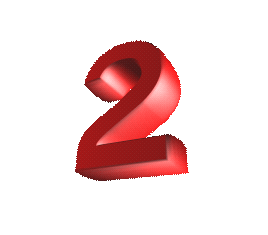
 2、Double-click the text, make changes to the number 2.
 3、Select the text, adjust the font in the top toolbar, select the bold, necessary, adjust the text size. You can use the text bottom right of the "Change Text Size" icons, quick adjustment, can also be entered directly in the toolbar, select the size here is 541.
 4、Switch to the color palette on the right side, the side of the text and text in red color adjustments. RGB is: 255, 0, 0;
 5、In the right panel, switch to the Bevel, select the “Text Bevel” for the second line the first, and "Bevel Height" is set to 1.00.
 6、Adjust the focus of the text, rotate to the following location, and the bottom right corner of the text using the text of the depth button to quickly adjust. This sets the text rotation and scaling values: Rotate: x: -15.88 y: -17.89, z: 8.20; Scale: x: 1.00, y: 0.94, z: 1.00.
 7、Switch to the light panel, click the "Edit Light" button to make alight editing, the three lights were adjusted to the following location, specific parameters are as follows: Light1: Angle X 202.25, Y 93.03; Light2: Angle X 360.00, Y 113.26; Light3 Angle X 40.45, Y 64.72. Set after, And then click "Edit Light" button to return to the text editing mode.
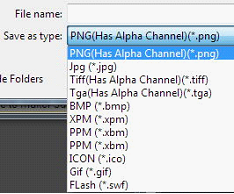
 8、After setting, click the Export button to export the text as “PNG” images.
 9、Follow the same steps, in turn generating 2, 0, 1, 1 four PNG images. This is easy in Photoshop to control the color and pattern, of course, in the Aurora 3D Text & Logo Maker in the made into one picture.


 10、Open the Photoshop CS, create a new image 1280*800.
 11、Double-click the background layer, the background layer set to normal layer. Open the Layer Style panel, set the “Gradient Overlay”, for the green, Radial gradient. The color values were around: #4d8c45 and #093603.
 12、Four pictures were added to the text in Photoshop, use “Ctrl + T” to adjust the size of each image to the appropriate, and change the color of the text “0” to pink.
 13、Create four new layer for each text layer, in each new layer, fill the text front area is white. On the each new layer set "Gradient Overlay", "2" on both sides of the color value of #d4ce00 and #fafdc3.
"0" on both sides of the color value of # 0c39b5 and #becdfb.
"1" on both sides of the color value of # 31e22e and #c2ffc6.The aftermost "1" on both sides of the color value of #fac9f6 and #d00ec0.
13、Create four new layer for each text layer, in each new layer, fill the text front area is white. On the each new layer set "Gradient Overlay", "2" on both sides of the color value of #d4ce00 and #fafdc3.
"0" on both sides of the color value of # 0c39b5 and #becdfb.
"1" on both sides of the color value of # 31e22e and #c2ffc6.The aftermost "1" on both sides of the color value of #fac9f6 and #d00ec0.


 14、Create a new layer, draw a few vertical bars, use “Ctrl + T” on the adjustment layer, adjust the layer “Opacity” to 40%. Finally, delete the text outside the front part of the excess.

 15、Add a new layer, select “Brush Tool”, where we can download we need any Brush shape, I chose a flower-like pattern, select the area in front of the text needed to click. Layer “Opacity” adjusted to 68%.

 16、Finally, create a new layer at the background layer, in order not to be too monotonous background, we use the “Brush Tool” again, I chose the butterfly, stars, and flowers pattern as the supporting characters, after use, get the final renderings.


How To Create a Real Cool 3D Logo


Subscribe to:
Comments (Atom)